HOME The idea of photography By shade photography

Wednesday, February 24, 2010

build my parodinal and my own fixer for developing BW film

2 comments | Read more...

Parodinal a homade film developer, why i made it?, Because i start to get dizzy with my behavior, like to cut film and only develop 4 or 5 frame. actually its ok, but it became expensive in chemical for developing film. i just use local developer, just 70cent and you can use it for 1 liter solution. the problem is, whether you develop 4 frame or 36 frame, the damage on developer is the same, not only because of silver that exhaust the developer, its also get oxidized by air. its make the developer turn bad after reuse 3 or 4 time.for finishing 36 frame cost me higher than the film it self. so i decide to make my own developer.

firt try to make d23 but, sorry, i cant find metol, its mean i cant make any of developer using metol, so my decision turn on rodinal, sorry i cant find it here, i must order it from outside of my country and its definetely cost me too much.

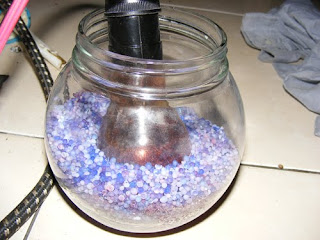
so i find a recepies, a parodinal, a developer made by mixing paracetamol, sodium hidroxide and sodium sulfite.

here is the recepies

Parodinal film developerWater 250 ml
Acetaminophen 30x 500mg tablets
Sodium Sulfite (anhydrous) 50 g
Sodium Hydroxide (anhydrous) 20 g


Mixing instructions: Add chemicals in specified sequence. LET STAND IN SEALED CONTAINER 72 HOURS BEFORE USING

Dilution: as Rodinal

Starting point development time: as Rodinal

Notes: Keep crystals from bottom of container with liquid when decanting, stir before drawing off concentrate for dilution. Use within 30 mins of dilution. Acetaminophen is sold as Paracetamol or Tylenol and is available from any pharmacy.

Please note that this formula has a maximum shelf life of 90 days.
( taken form digital thruth website)


i follow it exactly as it is. and the easies thing is

the weight of material can be measured with cake scales. its not as dificult as making d76.
you can find all the material in drug store and chemical store, all the material are easy to find, and not use for photography only. its all wide useable. and all so cheap, it cost me $1,5 for parodinal and fixer, and i still have lot of spare. its minimal quantity i can buy.

well the result, its not a fine grain, but its work well, dilute 1:50 means you can use it for develop more than 35 roll.

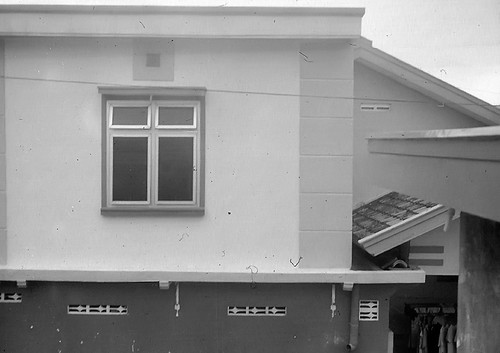
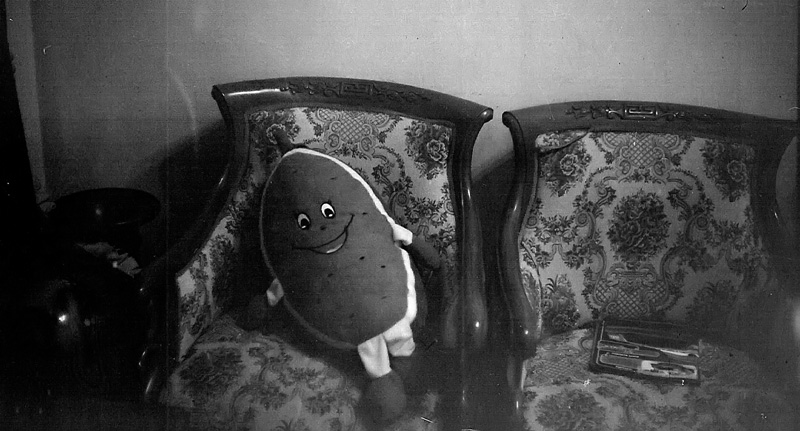
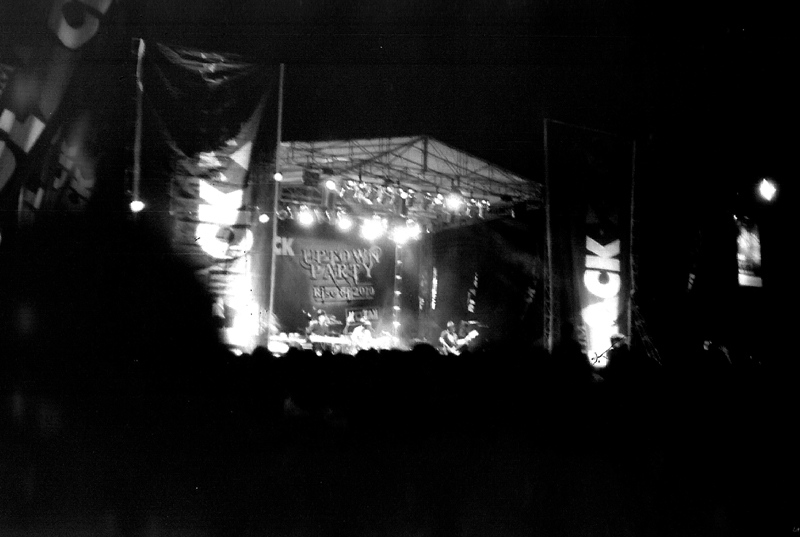
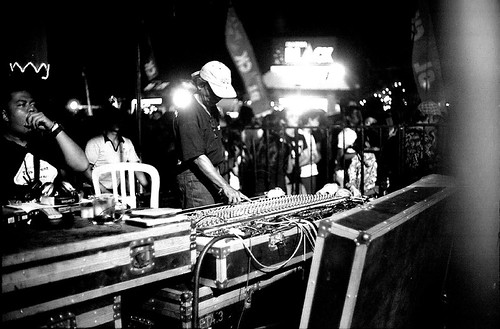
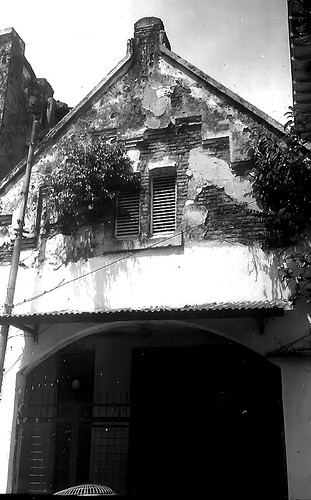
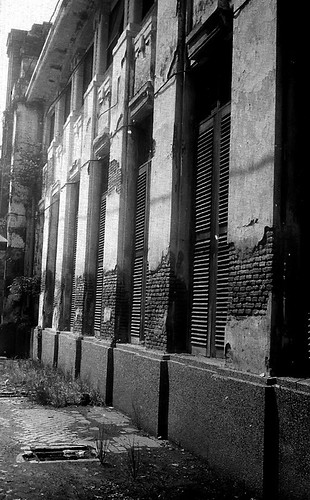
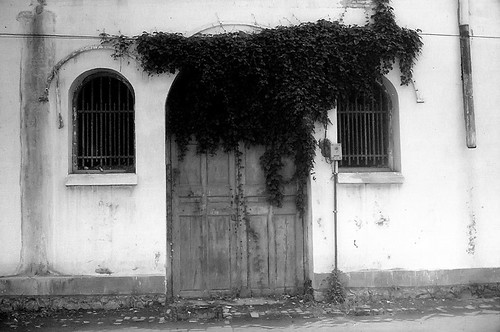
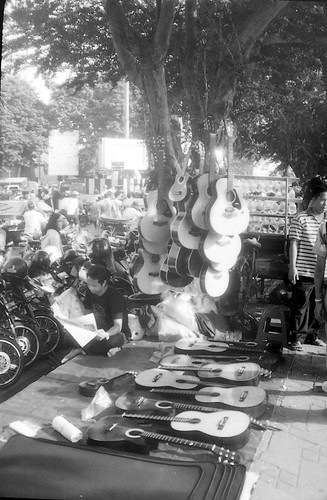
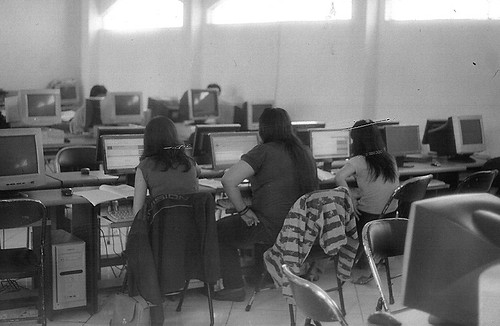
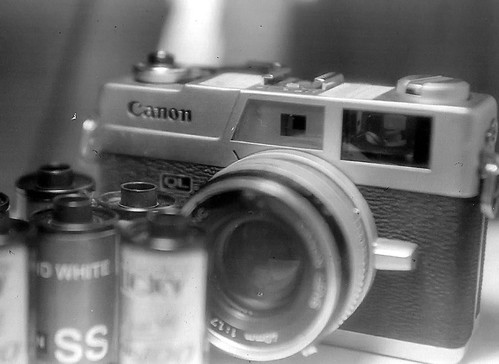
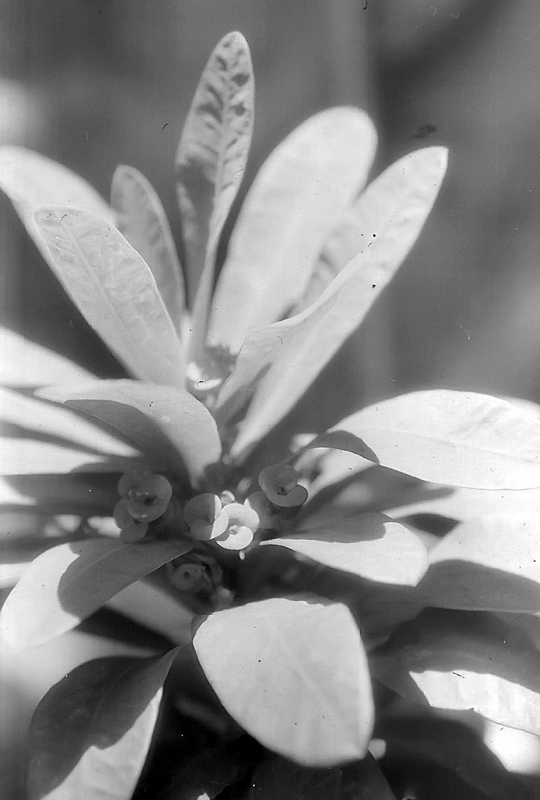
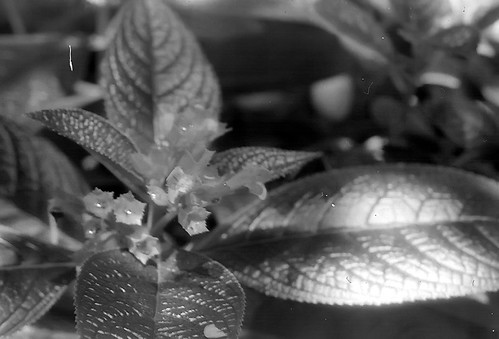
here is the example taken with ricoh KR5 and BW film expired 05, i have to compensate to iso 50 while the film are iso 100


a little note about parodinal,

1, It doesn't run well with acid stop bath just use a clean water for stop bath.
2. better use plain fixer not acid fixer.

here is my fixer formula ( widely use material, not only for photography, you can find it in chemical store, i bought it together with the parodinal material)
250gr sodium thiosulfate mix it with warm water 750 ml, after diluted add
50gr sodium sulfite, mix it.
than add water to make 1 liter solution.

for developer and fixer, only cost me $1.5 doesnt it soo cheap? and the best thing.. it still can make a nice picture even with expired film.


Tuesday, January 19, 2010

Developing Film BW starter kit. Hue he he

0 comments | Read more...
Yaa memang untuk memulai mencuci film BW sendiri kelihatannya susah, berurusan dengan kimia, dan berkesan mahal. Sebenarnya tidak juga. Jika dibandingkan dengan harga kamera rangefinder atau SLR analog biar bekas sekalipun, jauh lebih murah. Dan anda akan mendapat keasikan dalam mencuci film, tidak hanya memotret saja. Salah satu keunggulan dalam mencuci sendiri adalah anda tidak perlu nunggu sampai rol habis, tinggal potong dan cuci. Sisa potongan filmnya bisa buat motret lagi. Minimal cucianku Cuma 3 frame.

Berikut ini kufotokan peralatanku, sesimple simplenya.
Yang jelas harus dibeli, development tank, mau gimana lagi, pernah mau ngembangin sendiri alatnya, Cuma ribet dan riskan, jelas riskan karena ini memang media pencuci film dimana tidak boleh ada cahaya di dalam.


Charging bag. Aku ngaa punya, intinya digunakan untuk mamasukkan film dalam film reel developing tank dalam kondisi gelap gulita. Bisa saja anda masuk dalam kamar dan matikan semua lampu lalu sembunyi didalam selimut. Cuma cara ini ngaa praktis juga. ahirnya aku ngembangin sendiri dengan menggunakan kantong plastik yang dibelah ditengah lalu ditutup jaket ( thank atas ide bro irchan ) selama aku mencuci film tidak pernah filmku terbakar karena metode ini, biarpun aku melakukannya di siang hari dengan sinar matahari masuk lewat jendela. Aman aman saja.

Cara pakainya begini yaakantong dibelah ditengah agar bisa dimasukin develop tank dan film pembuka botol dan gunting. pada bagian ujung disobek sedikit dua buah agar tangan kanan dan tangan kiri masuk.
jaket jelek yg ngaa kepakai, kalo bisa jaket kulit/ imitasi, kalo ngaa ada jaket kain yg aga tebel juga bisa. aku cuma memakai jaket kain saja. jaket ini gunanya agar mencepit lengan kita saat kita meroll film kedalam film reel dan memasukkan ke dev tank. jadi yang utama adalah kantung plastiknya harus cukup tebel jadi cahaya ngaa bisa masuk. tangan kita dimasukkan kedalam lubang di pojok kiri kanan. karena plastik tidak bisa menseal lubang dengan baik. maka dibungkus dengan jaket yang lengan bagian depan ada elastic nya.elastik ditambah panjangnya lengan jaket membuat sangat kuat sealnya.
kantung yang di belah ditengah dibalikkan menghadap lantai, plus retsleting jaket juga membantu.
sudah cuma itu saja. kalau masih ngaa mau ribet yaa sembunyi di bawah selimut malam malam dan lampu dimatikan, bisa juga pertamakali nyuci caranya juga seperti itu.

Gunting dan bukaan botol

Botol aqua 330ml
Botol aqua 330ml minim 1 botol , he he he thanks bro thinker atas idenya. Kenapa dipilih botol 330ml karena jika digabung menjadi 3 kan 990ml. cuma kurang 10 ml dari 1 liter. jika diisi sampai full maka sudah lebih dikit dari 1 liter.
Dan kebutuhan dari develop tank untuk satu roll adalah sekitar 300ml, larutan dalam 1 botol aqua 330 ml tinggal dituang sampai habis, ngaa perlu nakar lagi .

Ember dan corong

Jam buat liat waktu, bagus kalo ada stopwatch, kalo ngaa ada pake semua jam bisa selama hapal menitnya.

Untuk untuk membuat chemicalnya, siapin air hangat 2 botol, masuk kan ke ember, aduk bahan micro MF nya diember sampai larut lalu dimasukin air dingin 1 botol , aduk , dinginkan lalu dimasukin ke botol lagi pake corong, simple kan. sama juga dengan acifix buat fixernya
Berarti anda membutuhkan 12 botol kecil. 3 untuk menyimpan micro MF, 3 untuk acifix dan 3 lagi untuk stop bath( buatnya cuma air plus cuka aja). Tapi jika ngaa punya yaa pake semua botol untuk penyimpanan bisa sih selama 1 liter keatas. Tapi minim 1 botol 330ml untuk menakar.

Untuk thermometer dan gelas ukur aku juga punya. Cuma sekarang sudah ngaa pernah dipake. Kurang praktis. Bisanya aku develop selama 4 sd 5 menit pada suhu kamar. dikamarku suhu air sekitar 27-30 derajat. Memang hasilnya tidak akan sebagus yang menggunakan metode 20 derajat 10 menit. Tapi untuk dapat suhu segitu berarti larutannya harus masuk kulkas atau didinginkan dulu di es. Dan prosesnya harus menggunakan water jacket segala. Walah ngaa sabar…..

Yang jelas metode saya ini metode asal saja. Jadi kualitasnya kalah dengan metode yang lebih presisi. Tapi daripada lama menunggu nabung buat beli charging bag dan kulkas khusus buat simpan chemical dan lain lain dan lain lain. Yg membuat kita malah ngaa jadi2 nyuci sendiri. Mendingan gini kan.

kalo masalah tehnik cuci filmnya cari aja dan diskusikan disini

Sunday, January 17, 2010

recycle your silica gel

1 comments | Read more...

Silica gel are material that popular for photographer to keep the box not to humid, to prevent some mushroom live on the lens. It turn form dark blue to pink when it absorb water. When it turn to pink, its time to change the silica gel. Many people said the pink silica gel can be recycled into blue again with heat.

At Fist time, I wondering should I recycled my used silica gel or not, since it not an expensive material. But it’s a DIY project. Why don’t I do that?.

I have read about recycling silica gel using a fry it on stove with pan, I ve tried it, but it crack easily and turn the silica gel into small pieces. But it turned blue anyway, mean it already recycled. Somebody said put it on oven. I still need my oven for my food. I won’t do that.

I guess the crack on silica gel was made by sudden heat on pan,While each silica gel contained full of water. So it need an even and balance heat like oven.

My idea turn on heat of tungsten lamp. Yes it hot. If you use 150 watt or above, it is very hot. I like to use this lamp for drying my negative film.

So just put the 150watt tungsten lamp on the box, can or anything that can handle the heat. In my case I use a glass jar.

Just leave it for 3 hour, or maybe less, Since I forget about my experiment an leave it for 3 hours for another activity, and when i back, the silica gel were turned blue.

this is the result of half an hour 150watt tungsten lamp. the last result i forget to take a picture. my hand got burned.

Success, but with some bad experience, I got small burned on my finger. I stupidly sunk my hand on the hot silica gel, it really hot guys .. wait until it cold and re use again.

Wednesday, December 30, 2009

DIY machine for agitating method replacement

1 comments | Read more...


since i start to develop my film by my own, my craziness is influence in my developing tank too.

Manual Developing film will be doing a standard action, agitation. Whether you do a rotating the film or turn up side down, you still have to agitate. You will have to concentrate on your agitate to get a good result. And the result are depend on your agitation, each people develop film with his own way. You cant leave your room, you cant take a phone call, you cant even smoke, otherwise your film will be ruin.

Why we need to agitate?

Here's why:

The only developer doing that's actually doing the work of developing is that which is in contact with the film. After a developer molecule has reacted with a silver halide, it is used up-it can no longer react with the silver halides.

If the developer is not moving, the molecules won't move around very much. This means that immediately above the areas of higher density, the concentration of unused developer molecules drops off, and the rate of development slows down very dramatically. This means that areas of high density essentially stop developing.

The problem doesn't exist as much in areas of low density, as there aren't nearly as many silver halides reacting as to exhaust the developer. Thus, in areas of low density, developing continues at a greater rate than it does in areas of high density.

Thus, over the course of the development time with no agitation, the shadow areas will get more development than the highlight areas, resulting in lower overall contrast.

Conversely, agitating provides a continual supply of fresh developer to the surface of the film. By agitating once every thirty seconds or so, you are keeping the amount of development essentially the same for all areas of the film.” Taken from Ben H at yahoo answer.

I don’t like this, I am not a patient man, I like to cut my film so I don’t have to wait for 36 roll finished, I even cut the developing time from 8 minute with 20 celcius to 4 minutes in 30 celcius. I still like the result.

And the agitating process of course is the most thing that I don’t like. I don’t want my developing result depend on my emotion. I want to create a simple machine.

The first thing is I want to make a rotation motor to move my dev tank. But I read some article about agitating continuously will create effect bromide drag, Bromide can drift downwards during some conditions causing streaks, if agitation is insufficient. It can move opposite to the agitation direction if constant unidirectional agitation is applied.. The jobo machine are rotating continuously, but very slow. Well creating motor with very slow rotation means lot of gear and calculation. Its not suitable with my craziness too.

So my idea is shaking continuously. Just a Smooth shaking.

I took my motor on broken massage machine (he he he, it's not broken but I destroy it to understand how the vibration created). Actually it just a simple motor with unbalance weight, so the motor will shake when rotate, its so simple idea. And I have to destroy it to understand the method.

And how to attach it, just glued the motor on the red cap ( if you have a dev tank like me) powered the motor with nokia mobile phone charger and the dev tank will shake smoothly. If you look at the water inside it you will see a small wave and the water are slowly rotating too.

Let’s talking about the result

first test using a exhaust chemical ( been used for six time)


no phothosop adjustment

Good enough for me, and the good thing is you don’t have to agitate. All you have to do is set the alarm, and pouring the chemical when the time is come. You don’t have to concentrate, if you use a glove, you don’t have any contact with chemical at all. you are still can eat or do something between developing process. But you still have to do washing process manually, but it just put the dev tank on running water. No big deal.

The good thing is, this idea good for push processing. Taking longer time on developing film will make our hand tired, will you stir or turn upside down your tank for 30 minutes in full concentration??? I won’t do that. I know somebody did it. But it won’t be me. here some of the result using canonet, and fuji neopan iso 100

second test, crazy idea, shoot with speed 1/125 indoor with room light.


third test, new year party (with photoshop adjustment)


canonet f1,7 s= 1/30 NO FLASH, neopan 100, dev 30 minutes at 30celcius


canonet f1,7 NO FLASH, s 1/30 neopan 100, dev 30 menit at 30celcius


canonet f1,7 NO FLASH, s= 1/30 neopan 100, dev 30 menit at 30celcius


canonet f1,7 NO FLASH, s= 1/30 neopan 100, dev 30 minutes at 30celcius


canonet f1,7 NO FLASH, s=1/30 neopan 100, dev 30 minutes at 30celcius


canonet f1,7 NO FLASH, s=1/30 neopan 100, dev 30 minutes at 30celcius

just hoping somebody try my idea and tell me the result, i will be glad if somebody give some input and comment.

Sunday, December 27, 2009

Build DIY light meter for photography, cheap, simple, and handy

2 comments | Read more...

I have been making this for along time ago, since I don’t like my K1000 light meter, maybe it already weak, and my metering feeling was much better than the meter it self , but every time I tried to make it, I always fail, until the last experiment.

my idea for the scheme was so simple. Give a power, an Light Depend Resistor series with potensiometer and a meter. Yes it work, definitely work but with very un accurate result. The meter cannot read difference on bright condition , but able to read even in candle light. If I modified the potensiometer and the LDR the result are inversed. Also there some mistake in taking light metering. Even a light beside me are measured too. If I make a hood on the LDR, it makes a metering so narrow. Every time you move, the meter needle will be move everywhere.

Than, I almost give up and keep training my feeling. No need metering anyway. Just use your feeling or exposure mat and ultimate exposure( check the link if you want). But I keep try to find the mistake I have made.

After using a multitester, I finally realized the mistake that I have made. The resistance of LDR are drop on kilo ohm in the low light. While in bright light the meter are at 1 ohm scale. It’s a big difference. There is no way a a needle meter can read such a big difference without any switch.

So I get an idea, why don’t I sink the LDR on my small multitester. Than buy another one for my tester?

So is start to build it. And for light measurement, I also add a view finder from broken plastic camera with 38mm view. It make the light only measured on glass of view finder, 38 mm, not to wide and not to narrow.

For adjusting I just use my fuji S700, set to iso 100, and metering to average. I have compare with Minolta Light meter its have a same reading.

Its time to test, its have a good metering.


a little bit over develop. but good enough for me, i am not ansel adams

the size is not big, its fit on my palm

And I just compare with my feeling. Of course object in open shade on sunny day will be 1/250 at 5,6. check the meter its same too, check with my digital fuji, its at a range too ( digital can read 1/225, 1/230 but at least it still at range). just make sure you metering with scale 1 kilo ohm for bright day. And scale 10 ohm in indoor. It just cheap meter. Only cost me $3.

Saturday, December 26, 2009

reducing process using cheap material

0 comments | Read more...
so i ask mu friend for my first experiment in "bleaching" LOL and he give me a recipes form his book. he never try before. the recipes is
solution A :
- Kalium permanganat 52.5 gram
- water 1.000 ml
mix it

solution B:
-Sulfuric Acid (concentrated) 32 gram
- water 1.000 ml
mix it.

than mix both of solutions with 1:1 or depend on your need. more solution B makes the effect harder.

from his recipes i know that the material are simple to find, i use calcius permaganat instead of kalium permanganat. that thing can be find on local drug store as a medicines
sulfuric acid, well we can find it on local paint shop or chemical store easily.

so after i got the material, i make my solution.
be honest my solution are totally blind composition, no scales at all, all just made from estimation, if it fail just wasted it, i just cost me less than $1. in my country these material are cheap.
the result
before process

after process

well its looks diiferent
the method are same with the " BLEACHING" in my earlier post. but for this time no shake, no smell, and not made my hand itchy. Its look better for a film with over exposed or over developed process

BLEACH THE FILM, using bleach for fabric, hi hi hi

0 comments | Read more...
my holiday experiment,
i had a holiday, and i stuck in my house because of rain, can't do anything in photography. so i turn on the internet to waste my time, when i read some article in BW photo, i read about bleaching. i made an misunderstanding about the term of bleaching. it should be reducing method. reducing mean we reduce the thickness of silver emulsion on film. this condition are film with overexposure or over developed process. the result when we print it will be too bright and lost detail.

so the crazy idea is, just take the bleach and bleach the film. a bleach, usually used for shirt or fabric. just mix it with 10 part of water. and shake the film on this solution.
result
before "bleaching"


after "bleaching"


its looks better, its a stupid success i guess. but it have a better result but with some down qualty of film. the solution is not good smell bad and make my hand itchy. so i try another method.